
Volume 2: Hasura Todo API - More details and finish with API development.
Authenticated/Authorized with Auth0, User permissions, etc.


Recap
From the previous volume, I've, started the project, Hasura account was created and linked to the Postgres database in Heroku, then I create some tables and experimented with GraphQL queries and mutations, I also established a connection between the todos, users, and app_api tables, and finally, for app security, I've set up some role-based permissions. If you missed it, I highly recommend checking it up here
However, after some observation, I wish to change the flow of the app.
Instead of having three tables like before, now I simple it to two tables, users and todos tables. It makes the app simple, straightforward, and easy for others to understand what is going on. See below

Then, the permissions should look something like this. see below.
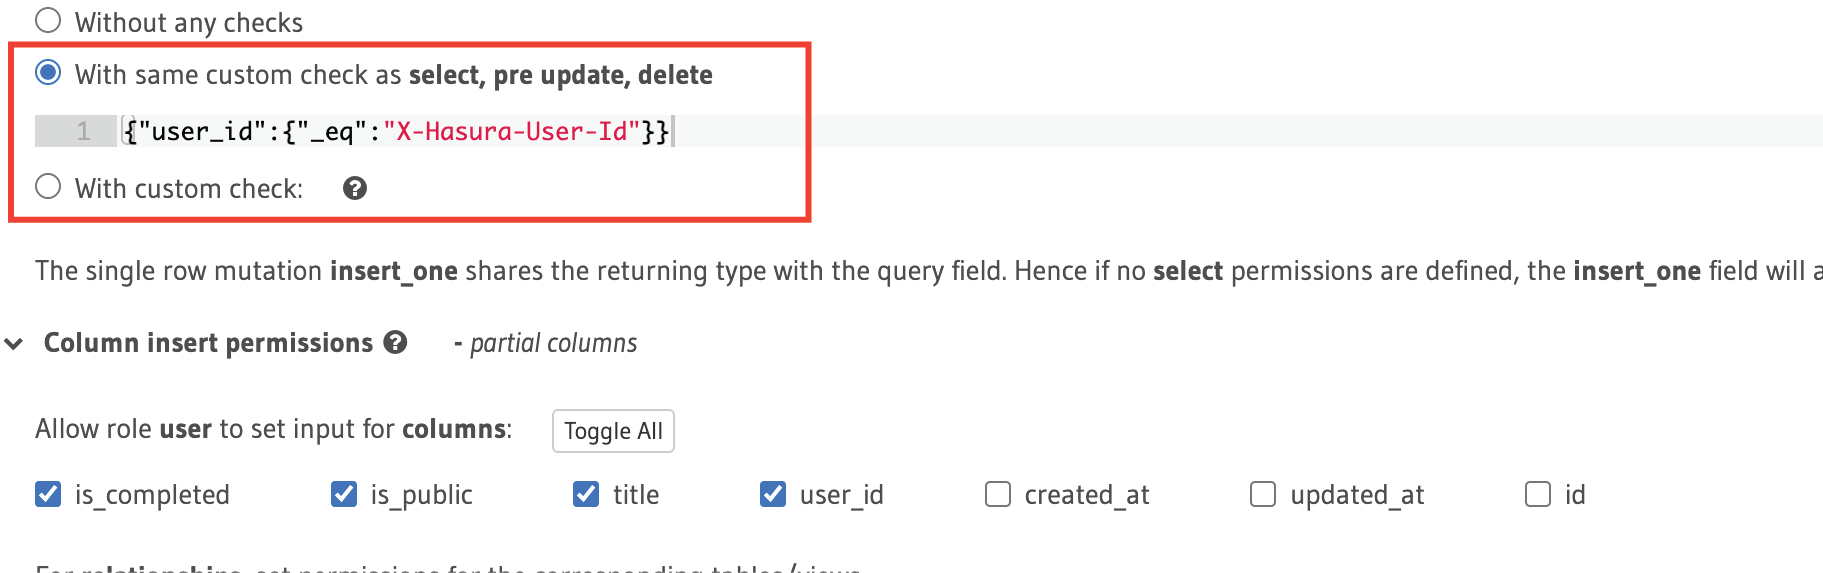
The user_id column is said to match the X-Hasura-user-id in the insert on todos table.
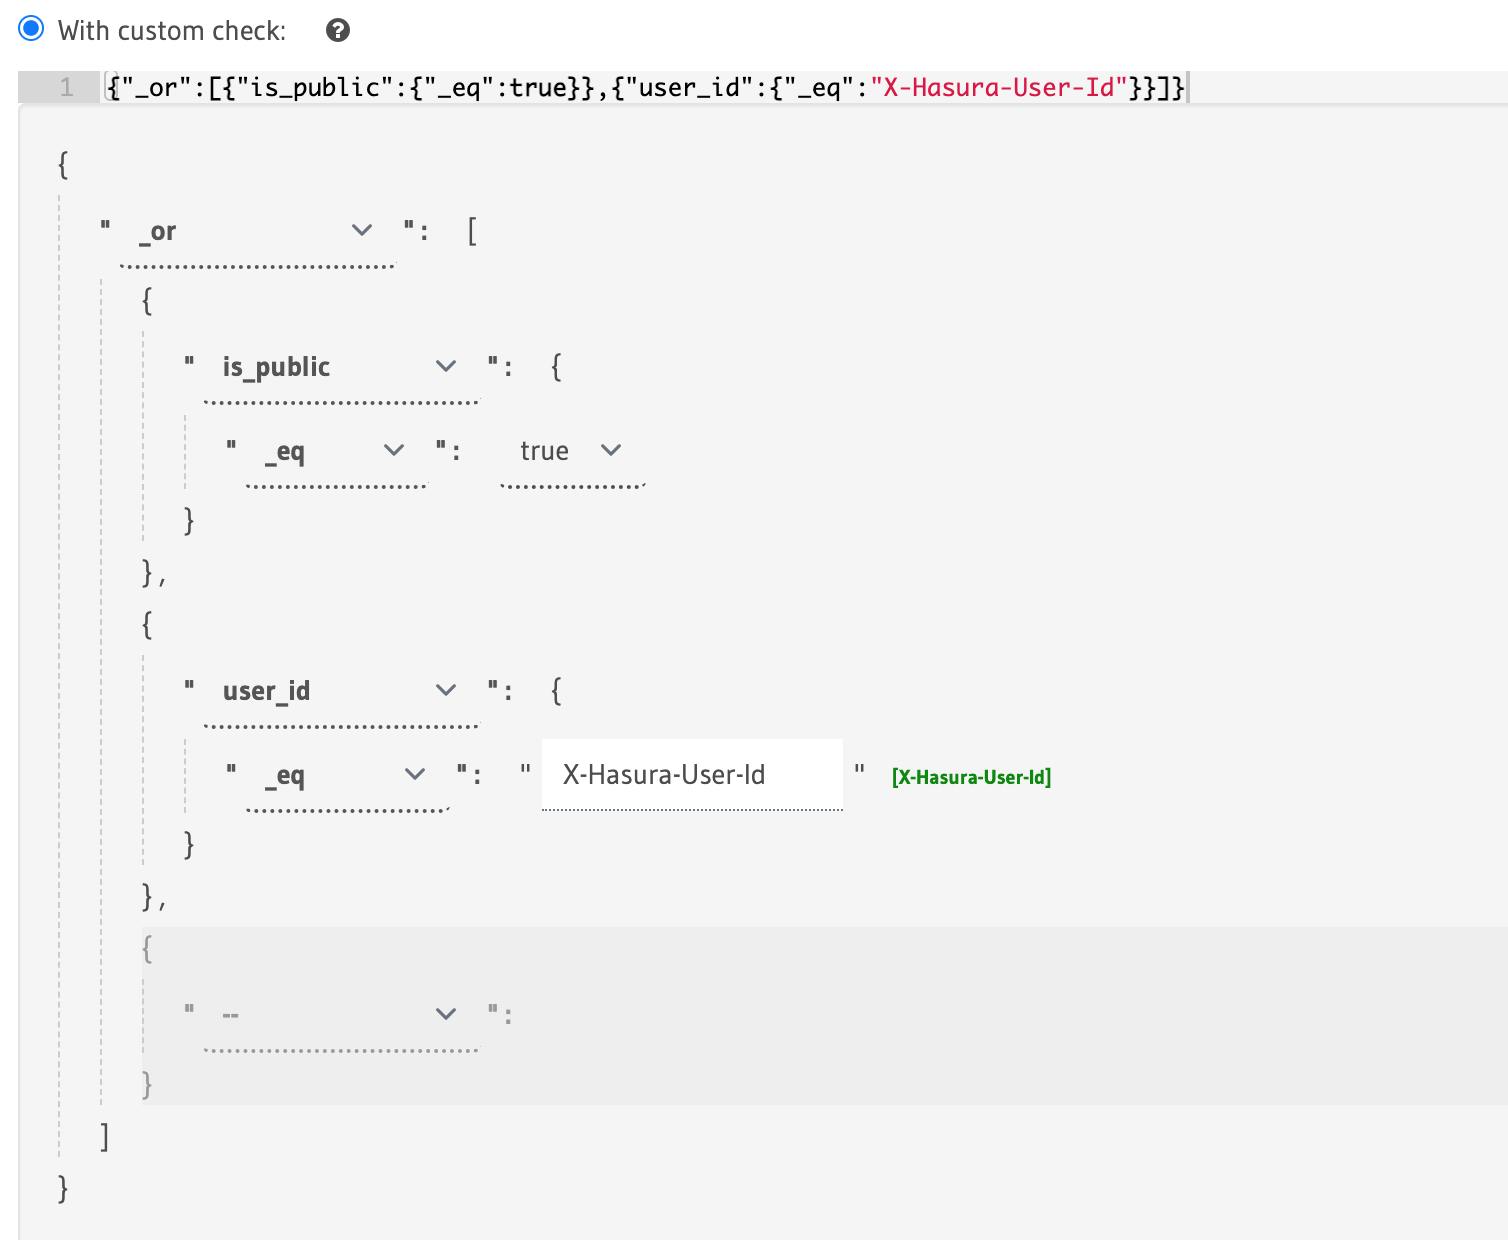
Users can be able to see public todos and the todos that belong to them, so select permission is like this,
The same thing applies to update and delete for the select, the user has access to all the columns, in update, the user can only update is_completed, is_public and title
Moving to the users tables, for the select, the permission is the id field is set to match the X-Hasura-user-id that is from our JWT token, See below
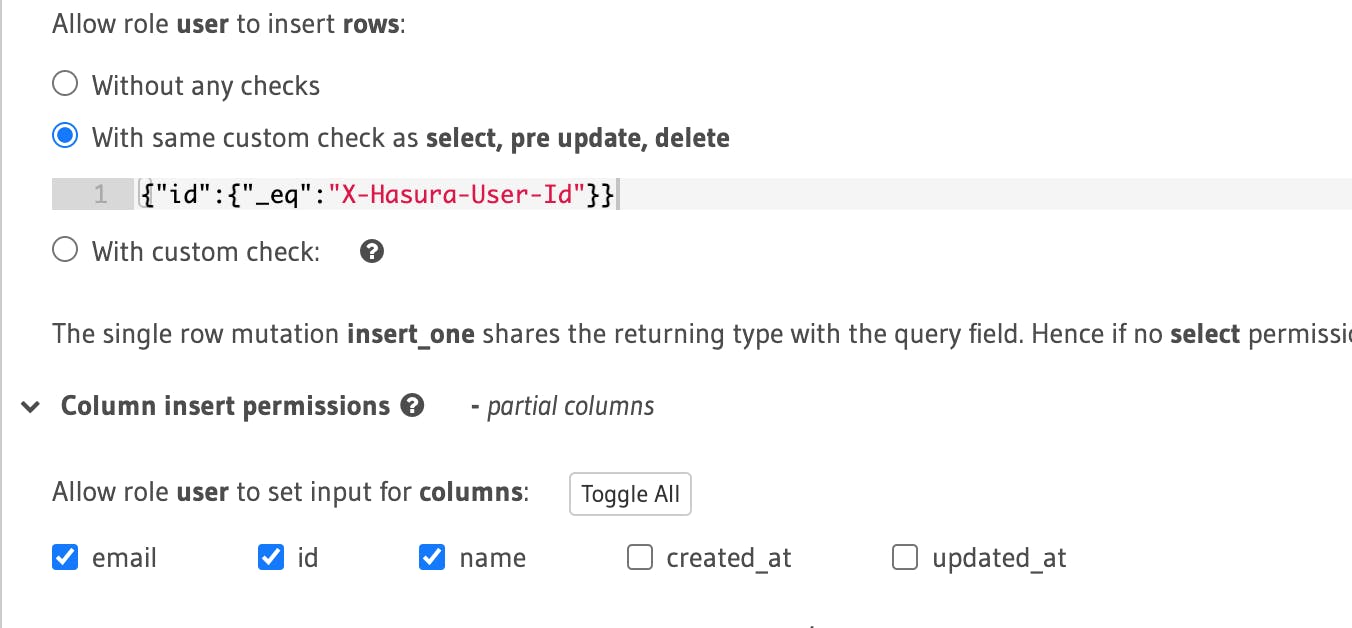
Same for the select, update and delete
Continuetion!!!
Authentication and Authorization
For authentication/authorization, I'm using Auth0 to authenticate and authorize users to the app for a variety of reasons.
- It is recommended in the Hasura docs.
- It's a well-known OAuth2-compatible authentication service.
- Finally, never use it before, so this is an opportunity
Generating a request for authentication
Sign up to Auth0 or login into your account and create a new single-page application click here for more details, we need to add an authorization key to our Hasura GraphQL request that points to our JWT token.

Auth0 is generating the right JWT, the JWT token has the session variable inside it, and the session variable that we have in our variable is X-Hasura-User-Id.
For that, I create Auth0 rules that will validate our request.
function (user, context, callback) {
  const namespace = "https://hasura.io/jwt/claims";
  context.idToken[namespace] =
    {
      'x-hasura-default-role': 'user',
      // do some custom logic to decide allowed roles
      'x-hasura-allowed-roles': ['user'],
      'x-hasura-user-id': user.user_id
    };
  callback(null, user, context);
}
Now, to see your sample request URI, go to Test Connections and copy something like this
https://<YOUR_APP_DOMAIN>/authorize?response_type=token&scope=openid%20profile&client_id=QVyJk5SGdkyLorohtdPT7roNyzqltxal&redirect_uri=http://jwt.io&connection=Username-Password-Authentication
When you reach the above URL, it will redirect you to JWT.io to see your JWT token. Now, copy it and go to the Hasura Cloud and use it as your Authorization key in the header. See below.

Before making a request, head over to the Hasura cloud Dashboard to add Environment variables. Generate the Env vars here then add it to HASURA_GRAPHQL_JWT_SECRET as the key and your output as the value, save and make your request.
Testing our API
Now, login and add a user with it todos, run the following mutations
mutation {
  insert_users_one(object: {email: "user@two.com", name: "user two"}) {
    id
    name
    email
    created_at
    updated_at
  }
}
and the output will be
{
  "data": {
    "users": [
      {
        "id": "auth0|6236654b647a36006ba3abd3",
        "name": "user two",
        "email": "user@two.com",
        "created_at": "2022-03-20T13:17:56.495124+00:00",
        "updated_at": "2022-03-20T13:17:56.495124+00:00"
      }
    ]
  }
}
this is the id gotten from the Auth0
auth0|6236654b647a36006ba3abd3
If you now add todos the todos will now be only associated to the user with the above id Play with it and use another Auth token to create new user and his todos
APIs Use
I'm gonna try to develop a to-do app (Mobile or Web) to use the API I built here. Check out the repo to see how the queries and subscriptionsgo.
That is it for now, till we meet in the next volume
As always, you can follow me on Twitter at @mxhdiqaim, Github @Mahdi to see my progress. DMs are always open for work, friendship, and relationships :)